Hello all! I’ve seen that many people have been requesting a tutorial on how to make your own skins from scratch and today I’m here to show you how I do it. Now, there’s two ways that you can do this, one is by cloning a reference image onto your skin and then doing some edits. This method is much easier only if you can find a reference image that has everything you want (Good quality texture, nice skin pattern, decent shadows and highlights); however, finding the perfect image can be quite the challenge and unless there’s multiple pictures of different angles of the same dinosaur, trying to blend two different images together on one skin and making the transition seamless is very hard. Since there is no standard of what dinosaurs really look like, interpretations will be vastly different. For example, if you’re trying to skin a lion using multiple reference pictures is very useful because while individual lions will have some differences they will essentially be the same and thus will blend together. This is not the case with dinosaurs.
The second method is what I will be showing you how to do. It will be more tedious and time consuming but it is easier than trying to find that one perfect reference. Essentially, you will be doing most of this yourself, the texture, shadows/highlights, and other details. It sounds daunting, but with some practice a lot of this will become second nature (especially the shadows/highlights.) So with that long winded speech out of the way let us begin with what you will need:
Gimp – You can probably use any version you want since the tools will be the same. Gimp is a free alternative to Photoshop and can produce similar caliber results. While you can certainly use Photoshop , the name of the tools will be different so keep that in mind if you do plan on using it.
Nifskope- This is so you can view your skin on a 3D model. Instead of going into JPOG to check certain details like joint seams, you can check them here. Also this program is important for getting a wire frame template which is what we’ll use as a reference when drawing in certain shadows and highlights.
Tamara’s Nifs – This is a collection of jpog dinosaur models that have been converted into nif files that nifskope will be able to read. This collection is crucial to view your skin in Nifskope. With JPL’s closure, you can now find her nifs here:
http://modgenesis.forumlaunch.net/viewtopic.php?p=137875
FRAPS – You technically don’t need this but if you want to take pictures of your skins once they’re in game you’ll need something that can take screenshots; FRAPS does this well.
Now we can begin!
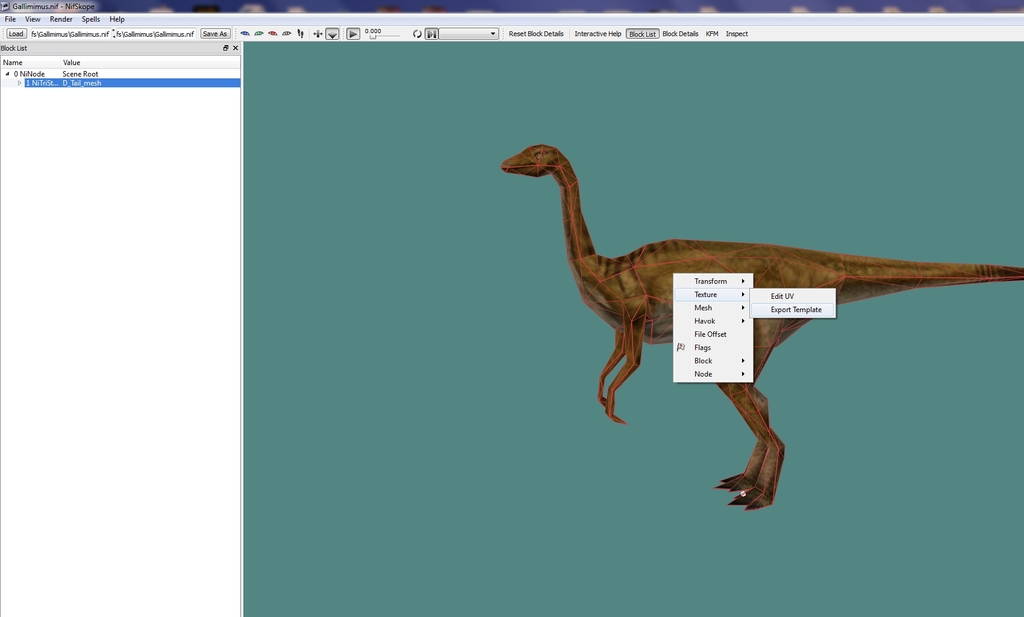
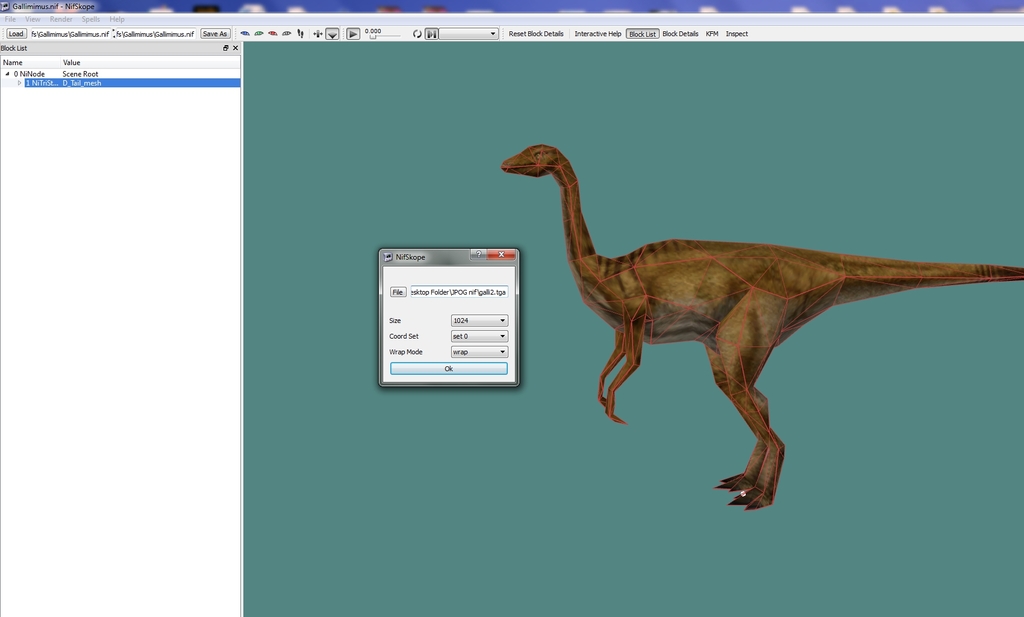
First, start by opening up a clean default skin in JPOG. If you want to create a higher resolution skin this is where you would do it. Simply go to image and then scale and put in the desired height and width. Once you have the size you want open up Tamara’s nif of the dinosaur that you’re skinning. Once there, right click on the model itself and a drop down window will show up. Navigate to Texture and then Export template. Once there you will have a very small window pop up. This will be how you’re exporting the wire frame. Type in where you want it to go at the top, then set the desired resolution of your skin (in my case it’s 1024). Make sure Coord Set is set to Set 0 and Wrap Mode is set to Wrap. It should look like this:
- Spoiler:
- Spoiler:
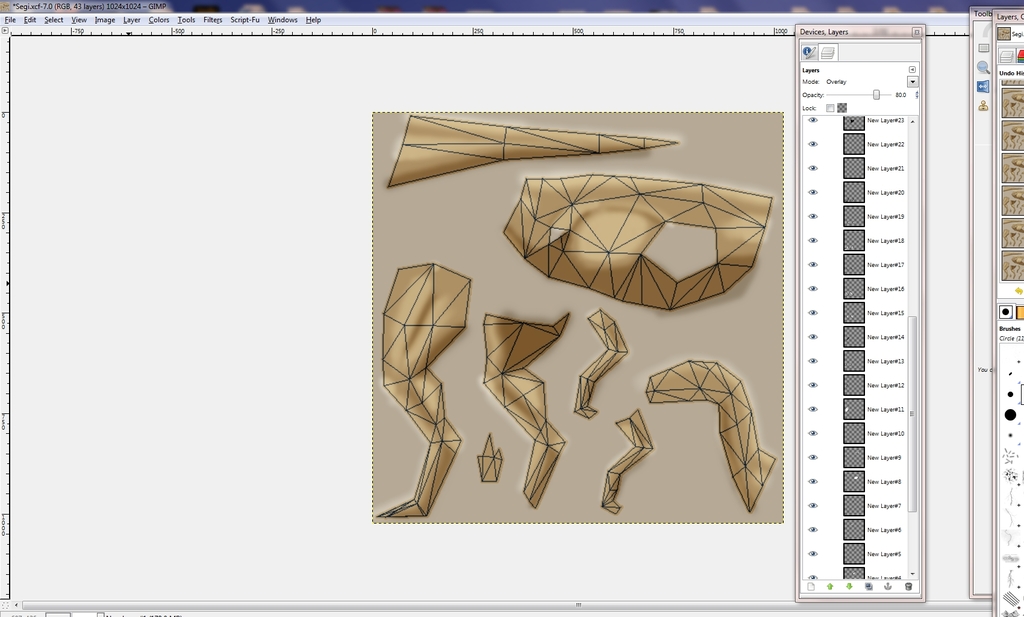
Once you export the wire frame, open it with GIMP (it should save as a tga file.) Once you open it, it will be the wire outline of the model on top of a white background. To fix this, go to the Select by Color tool and just click on the white area. Because it is an even white it will select it all.
- Spoiler:
Now that the white is selected, click Select over the image and choose Invert. What this does is it selects all of the black lines. Now, copy and paste those lines as a new layer on top of the original JPOG skin, it should now look like this:
- Spoiler:
Next, decide on what general color most of the skin will be (For me it will be orange) and then take that color and edit the saturation. This will become the background color; it’s important to choose a color that will allow the skin to stick out while still being easy on the eyes. Once you have the background color take the paint brush, select the original skin layer and paint the entire surface with your chosen background color. Once you’ve done that you’ll have the wire frame over the colored background. Now, choose a color that is only slightly saturated instead of greatly saturated like the background. Go to the fuzzy select tool, and select the wire frame layer and then go and invert the selection again. This should allow you to paint the inside of the wire frame; with this ability, chose the background layer again and paint. What you should get is the wire frame colored in against the colored background but the wire frame should be visible over the base color. Once you have that, go back to the wire frame layer, choose the fuzzy select tool and pick the holes for where the arms and legs are attached to the torso. One at a time, paint the selected holes on the background layer the color of the background. This is important for joint issues later. If you’ve done everything right it should look like this:
- Spoiler:
Now we can get on to the shadows and highlights on the animal. The tricky part here is that you’re going to be drawing it in yourself. Perfection will not be achieved overnight with this part, so if it doesn’t look on your first skin that is to be expected. Also, don’t get discouraged if it doesn’t look right at first, it will look fine later. For this part you’ll also want to get various pictures of your chosen dinosaur to see where highlights and shadows might be. However, some things might be universal for dinosaurs, like the underbelly being shaded and there being a slight highlighting on the top of the back. Each shadow should get its own layer so that if you mess up on one piece you can simply go and fix it. When you paint light or shadow you’ll want to use solid white or solid black and paint. Once you have the shadow or highlight you want change the layer mode from Normal to Overlay. This will greatly reduce the power of the shadow or highlight which is what you want. To make the shading or lighting more natural looking you can go to Filters/Blur/Gaussian Blur. Once there, a window will pop up with a blur radius; depending on how large you make the radius you can blend it more. My advice is things like the shading on the underbelly or highlights on the back should use higher numbers while the more fine work (like the skull) should use lower numbers. At the end of the day I can’t exactly make a guide for this part and I find telling people to use certain numbers will not work. You’ll have to experiment and play around with different things until you find what works. Don’t be afraid to make mistakes. The shading and highlighting should look something like this when you’re done:
- Spoiler:
Remember you should use the lines in the wire frame as a guide to where certain muscles and joints should stick out. It should be somewhat obvious but if it’s not check the original skin in nifskope and see what part of the body certain lines cross to judge where say the thigh muscle should be drawn in. Also, in this skin I didn’t draw in the skull myself and instead opted to go with a reference image for just the head. This will only work if you can blend the reference image with the finished skin, so for this reason I leave the skull until after my texture is finished.
Now we’re moving on to texturing; this process will not require the wire frame and at this point I like to leave it invisible, but you can leave it on if you’re more comfortable with it. Texturing can be a bit tricky, in this skin I only use three so you can create a great skin with just a few textures if you work with them correctly. You can use a lot of textures together but I’ve learned that using too many tends to create a mishmash of texture that winds up becoming too complicated to distinguish the numerous textures you used. For textures, the most important thing is to get quality reference images. You can either use textures from the internet or just clone textures from various source pictures but in this case bigger is better. The larger the picture is, the better the texture will keep its quality when you shrink it. You’ll want to come up with a simple base texture first. I find leather textures work nicely for this but you can definitely experiment; in fact I encourage you to experiment with different textures!
Use the free select tool to select either the whole texture or a portion of it. Once it’s chosen, copy and paste it onto a new layer. At this point you’ll want to make sure the texture is in gray scale or better yet gray scale the whole reference image. To do this, go to Colors/Desaturate and then pick average on the window that pops up. This will gray out the image and take the color out of the equation (unless you want to leave the texture which in that case you would leave the color on.) Whether you used a portion or the whole texture you’re going to have to resize it. When scaling it down remember to not make the texture too big on the skin. Try to make it small but not so small that you can see it. Here’s my base texture for this skin:
- Spoiler:
After you get the first layer down try layering some textures on top of it that complement it. For example in this skin, the next layer I use is a small scale texture that blends well with the leather base texture. Again I make the texture fairly small but large enough so you can actually see it, here’s the result :
- Spoiler:
The third and final layer of texture I use on this skin is a larger scale/cracked skin pattern. This time I make the texture a bit bigger because I do want it to stick out. There’s not really one area or body part that I’m looking to cover them with (they would eclipse the base textures underneath it) but rather I’m trying to dust the body with a fair amount of it. You can use textures like this to spice up other “plain” textures like leather or scale. Since this was going to be a smaller dinosaur I decide to only use three layers but for bigger dinosaurs you might want to use more for different body parts (for example, larger scales on the body and smaller more detailed ones on the skull.) I did this with scales but this would also work with any textures including feathers and fur! Here’s what my skin looks like after the third layer :
- Spoiler:
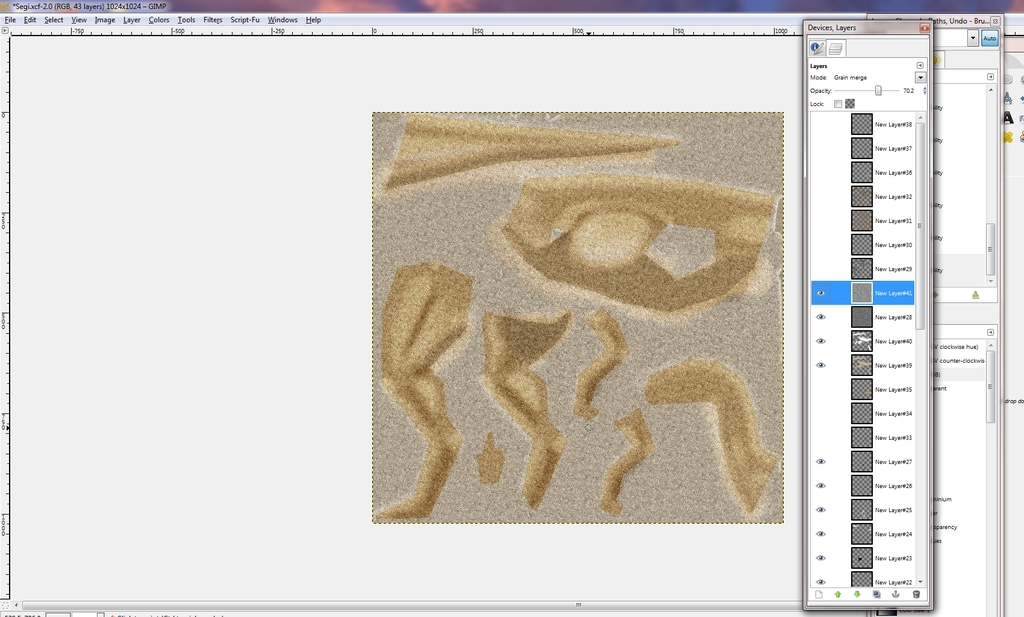
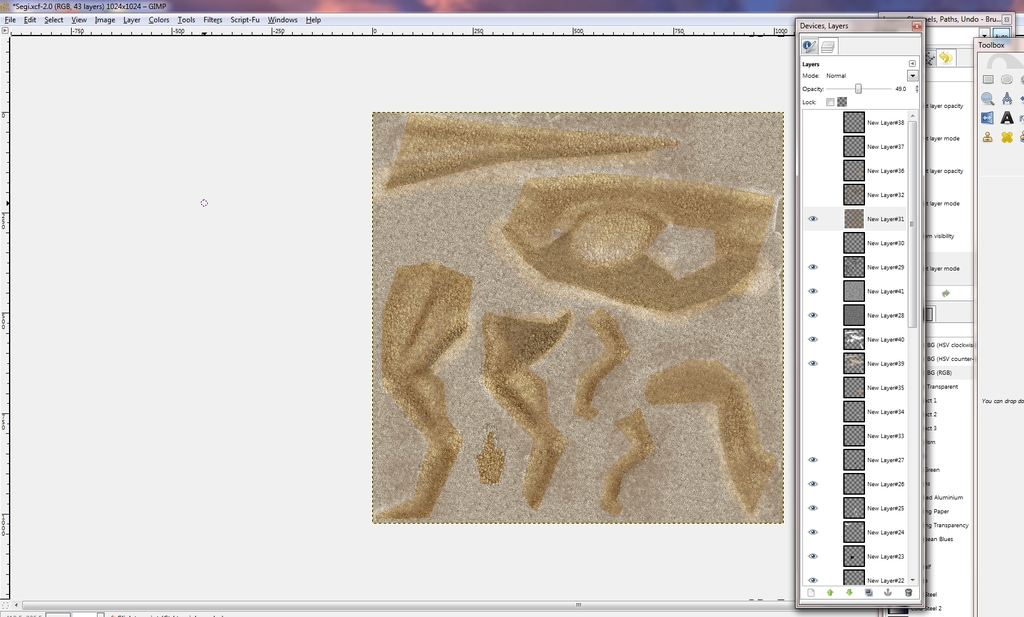
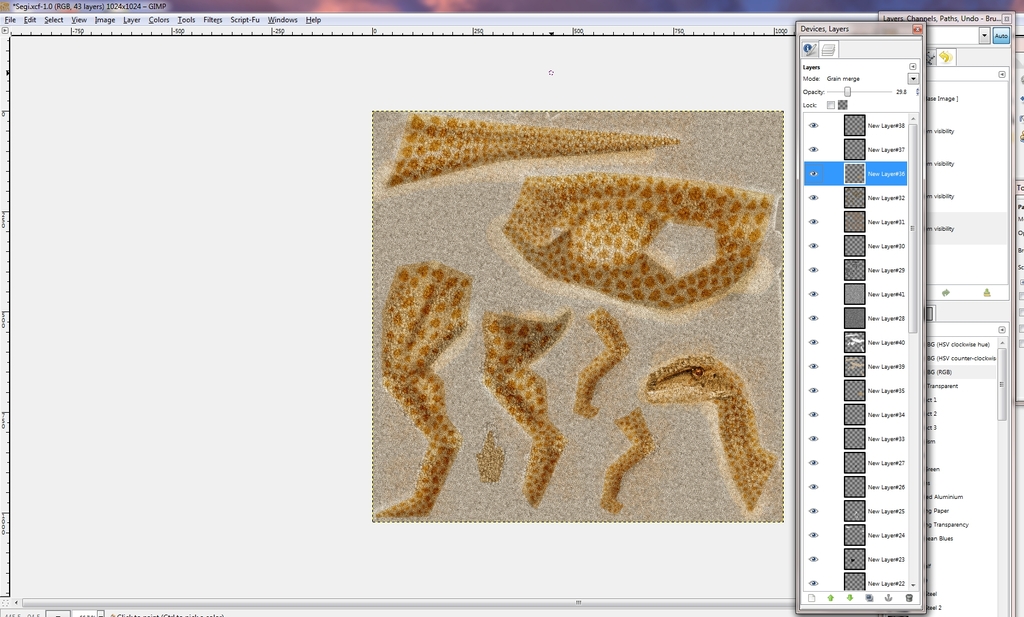
Now that the texture and main shadows and highlights are done we need to move on to color; since you gave your skin a base color way back when you have something decent to work with. Now for the skin tones you’re not going to want them to be the normal mode on their layers; this is because they would blur your textures and make it look more of a paint skin than a textured one. What I like to do is to enhance the base by using modes like grain merge, overlay, and hard/soft light. What these do is just change colors but keep the texture visible. To illustrate this check out how my skin would look if I left the speckles of darker orange in normal mode:
- Spoiler:
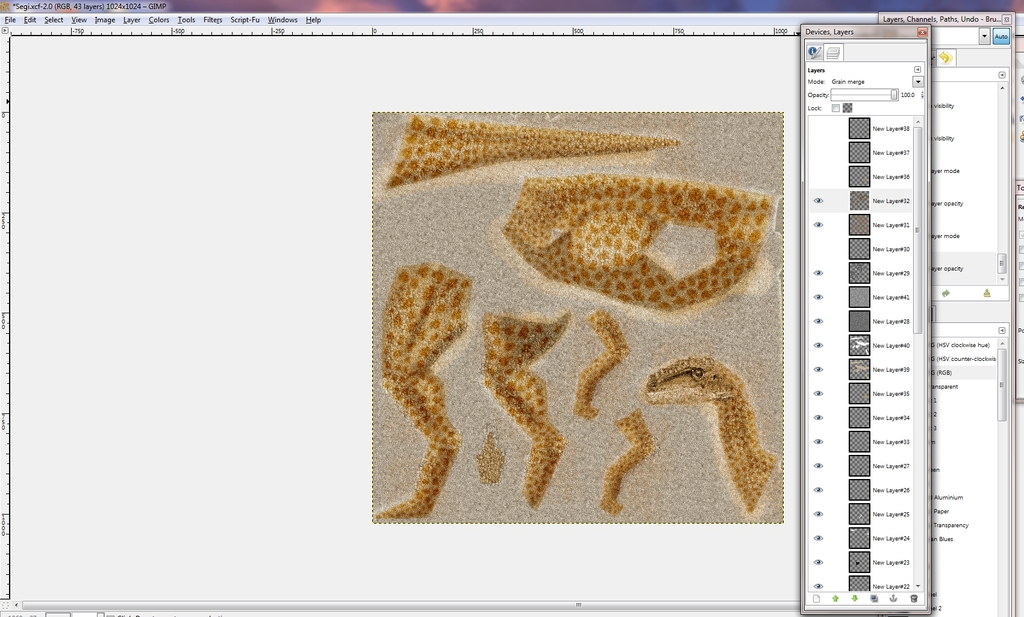
Compared to what I went with (Grain merge):
- Spoiler:
For stripes, spots or patterns you do have some options. You can go with the normal on this; I especially recommend normal if the pattern is going to be a dark color. If it’s a lighter color, you can with the normal mode or some of the other modes I went over above. On this skin I plan to make spots, they work on the skin whether I leave them in normal or use grain merge:
- Spoiler:
Grain Merge:
- Spoiler:
Now my skin is basically done but this is the point when I added in the skull. As I said above I didn’t draw this skull in, instead I used a reference picture and cloned it onto the skin’s head. Ideally, you can find a picture of a dinosaur head that matches the species you’re skinning but in this case I actually used a coelophysis head and it worked just fine. If you can’t find a good picture of your exact species try to go for something close (ex. Giganotosaurus for Carcharodontosaurus.) I gray scaled it and then colored it over using one “color” mode layer of my orange and another one of the same orange only applied as a grain merge layer. Here’s the finished skin:
- Spoiler:
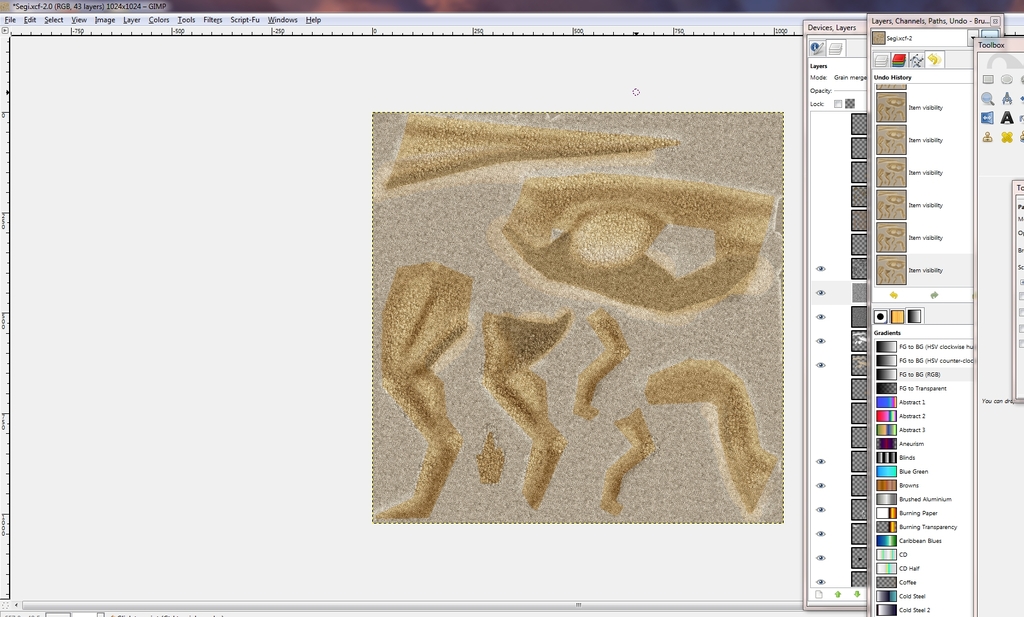
And now you have your skin made from scratch! You can save it as a dds to check it in nifskope and see how it looks on a JPOG model. Remember to save the skin in a xcf format first, this will save each layer instead of merging them and if helpful if you don’t have enough time to do it all in one day. Save another copy as a jpg and then save that as a dds file. This guide will not cover how to put your skin into the game; however my hope is that this guide helps with people who are unfamiliar with the actual process of skinning. If you have any questions please feel free to ask! Happy skinning

.