SpinoInWonderland
Hatchling


Posts : 88
Reputation : 7
Join date : 2016-06-09
 | Subject: Illustrative skinning tutorial by maximusthedark  Mon Aug 15, 2016 11:04 am Mon Aug 15, 2016 11:04 am | |
| - maximusthedark wrote:
- I've been aware of some users having some difficulty in skinning from using the CCT converter to extract the skin bitmaps to actually overwriting the skins in the Toshi Material Library (TML) so I decided to make a turorial that uses mostly pictures to help users (specially kids) in skinning their dinosaurs...
first of all of course you got to have the appropriate programs to succesfully extract, edit and place the skin back to the TML file...
those are three steps so there are three programs you need to to do that and here they are:

first you need a TML file... they can be found in the jpog\Data\Matlibs folder...
to extract the skins you need a CCT converter...
to edit them you may use Adobe photoshop, Gimp or any other image editing software like MS paint (MS paint can't handle transparency) you also need a DDS plugin to be able to save them into DDS file format...
and to place them inside the TML you need a Hex editor...
If you have trouble acquiring these programs just PM me and I'll try to send them to you... or simply contact the Admin...
okay.. here are the programs... just drag them to your desktop or any other folder to use them... the HEX exe is used to install the HEX editor... the Hex Editos/Editor, Photo-shop DDS plug-in and the CCT converter is now compiled in one...:
[align=center]filebeam[/align]
[align=center][size=150]SKINNING_TOOLS[/size][/align]
[align=center]megaupload[/align]
[align=center][size=150]SKINNING_TOOLS[/size][/align]
all those programs (except Adobe photoshop) can be found and downloaded here... ^
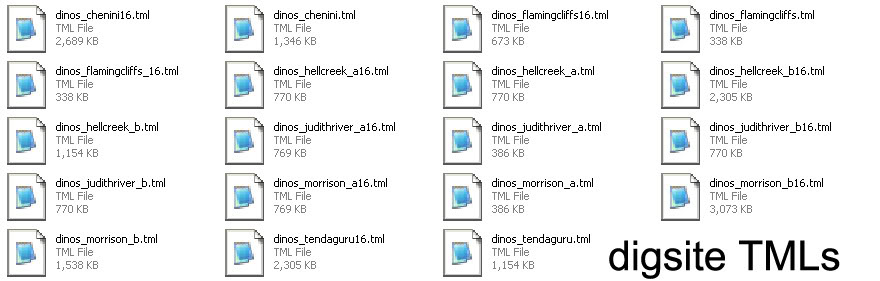
Now, first locate the TML files inside the jpog\Data\Matlibs folder... then locate the Dig Site TMLs... that's where the dino skins are stored...
then on your desktop, right click and create a new folder:

then in the matlibs folder choose the digsite of your choice, copy it and paste it in the new folder:
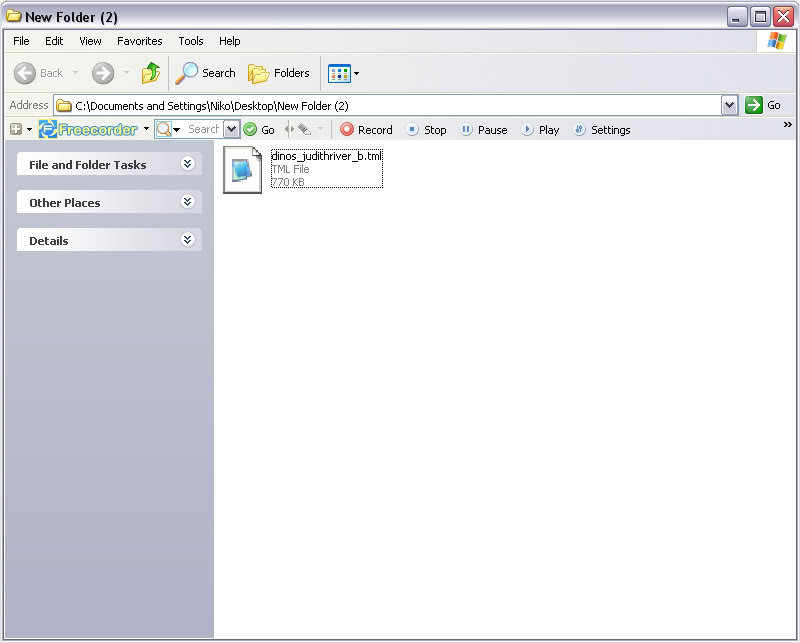
as you can see I copied the Judith River b digsite TML because I want to edit the Rex skin as an example
now what we need to do is extract the skins in the TML, so we're gonna use the CCT converter...
don't double click the CCT icon because nothing will happen except a command window will pop up...
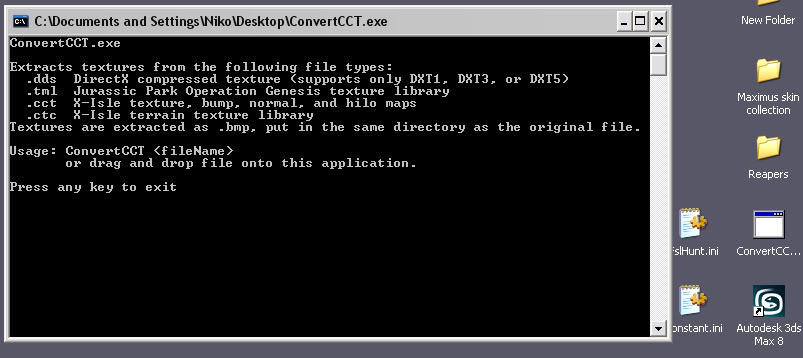
to extract the skins you just have to drag the TML file on the icon itself...

once you done it, a command window will pop up and will tell you that it extracted the skins in Bitmap format...
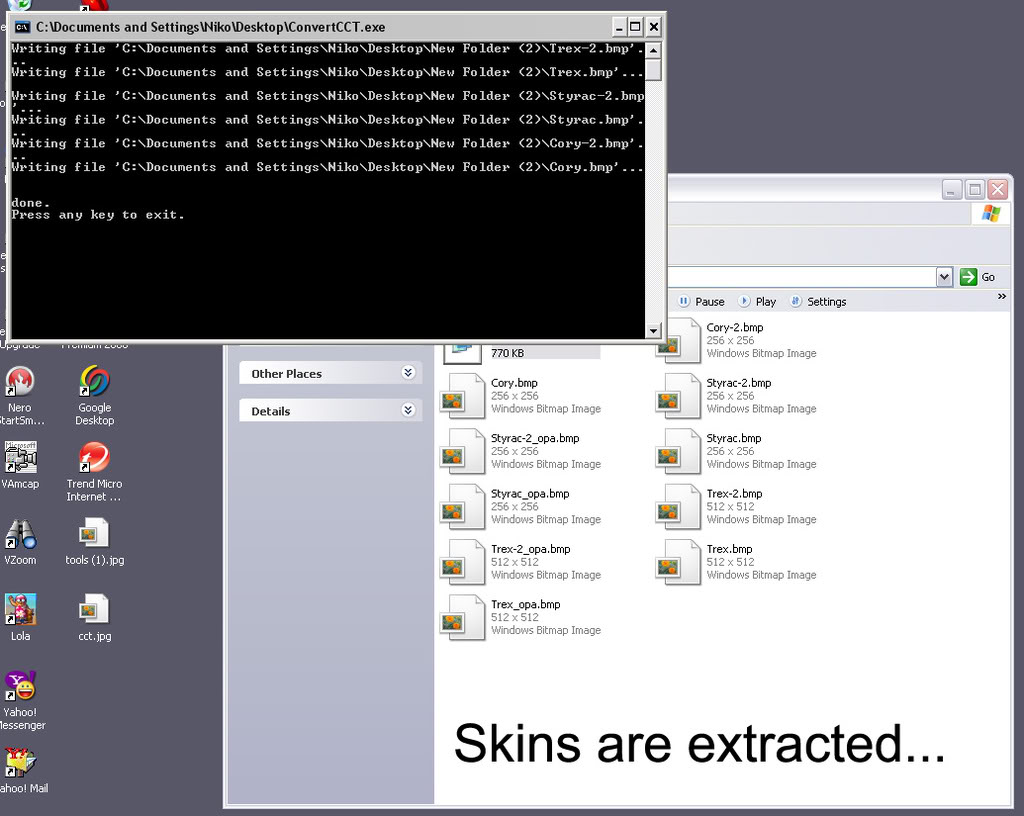
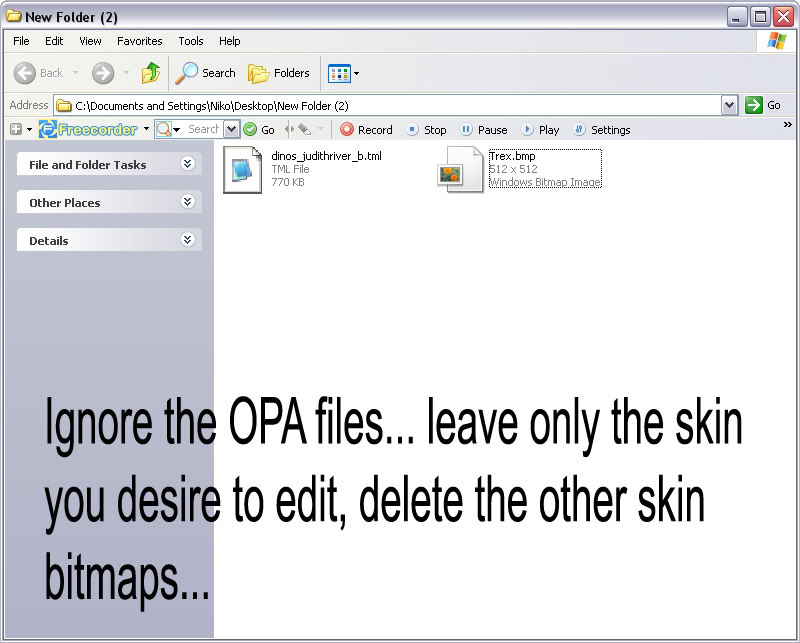
now you see here is that I deleted the other skins that I don't need to edit, so only the rex live skin is left... ignore that OPA files...
now open it with your image editor... you have to double click on the padlock icon to fully edit the skin... (incase your applying transparency)

once you're done editing the skin, save the file in DDS format...
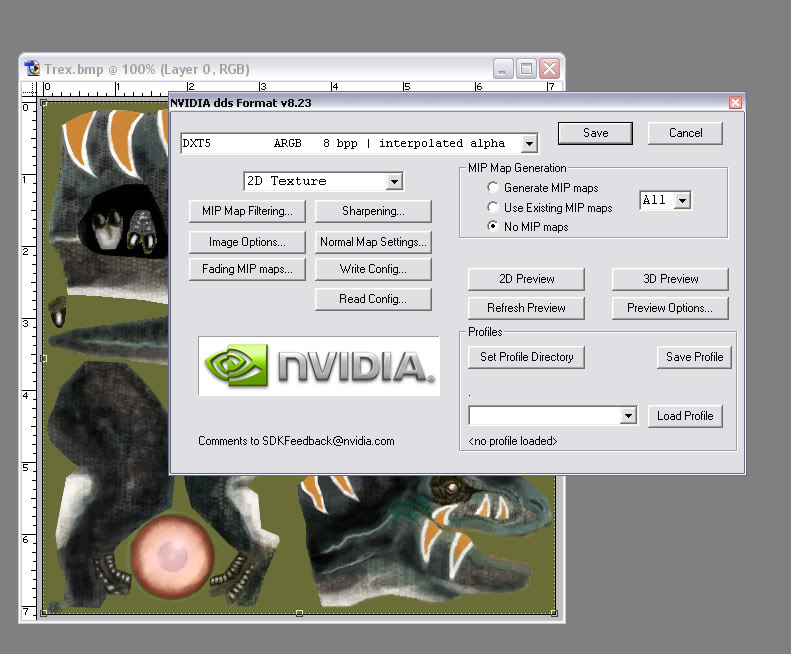
it will show you some settings... just like ERC's simply apply the same settings on the nvidia window...
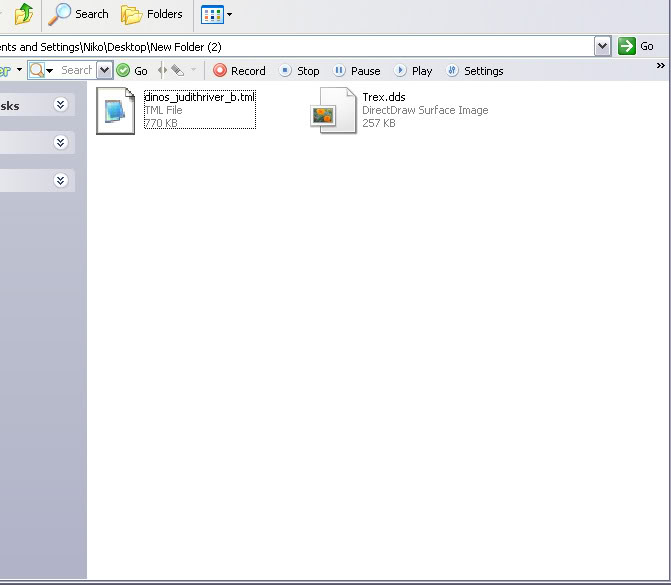
now I have a DDS file of the skin and ready to be written on the TML... you can now delete the Bitmap copy of the skin...
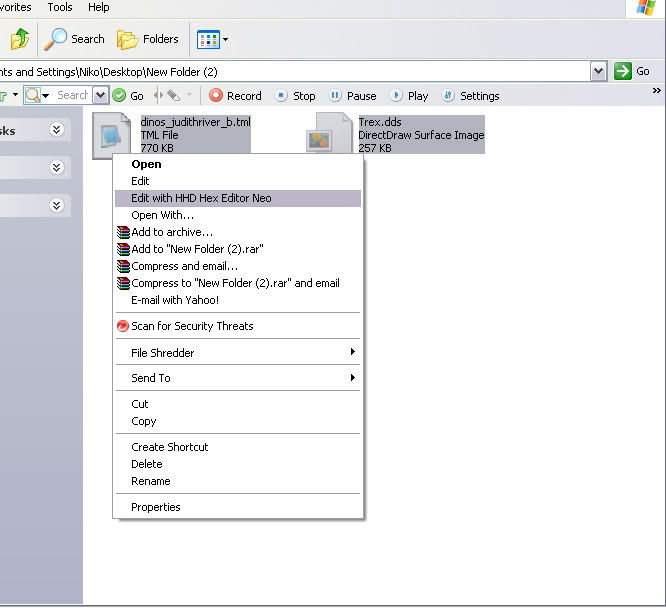
now highlight them both and right-click... click on the edit with HDD HEX Editor Neo... that option will appear if you succesfuly installed the Hex Editor
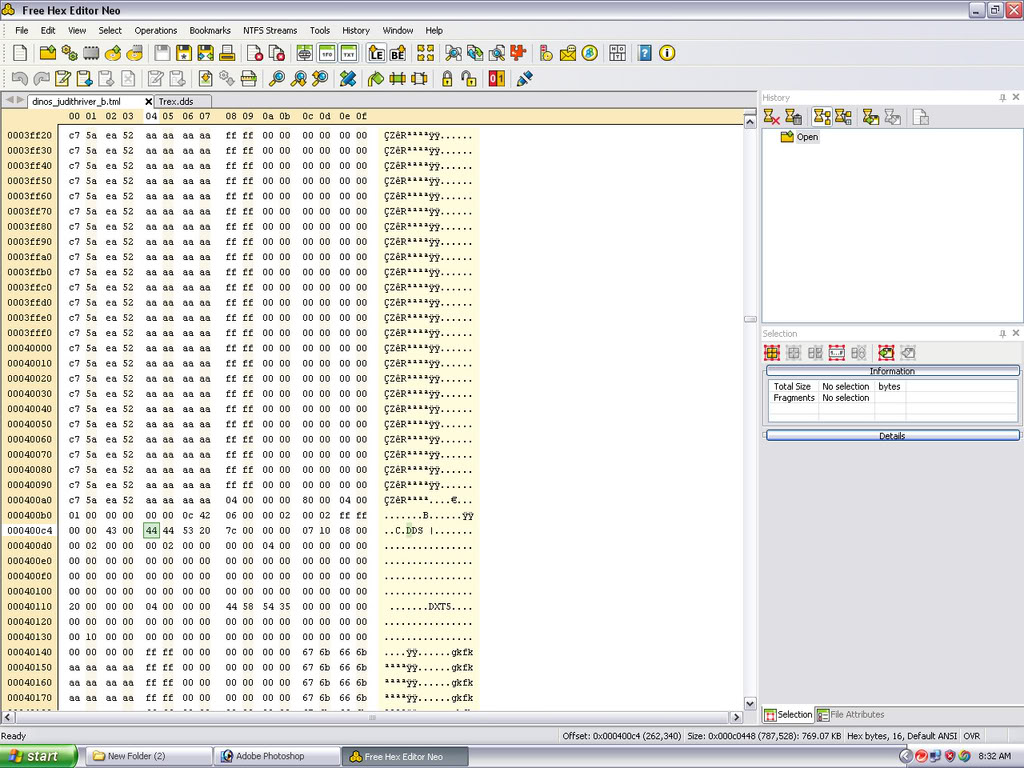
Once it is opened it should look like this...

now click the digsite TML file tab then drag the scroll bar way down to the bottom... you will see that T-rex is on the bottom while Cory (Corythosaurus) is on the top of the name arrangement...
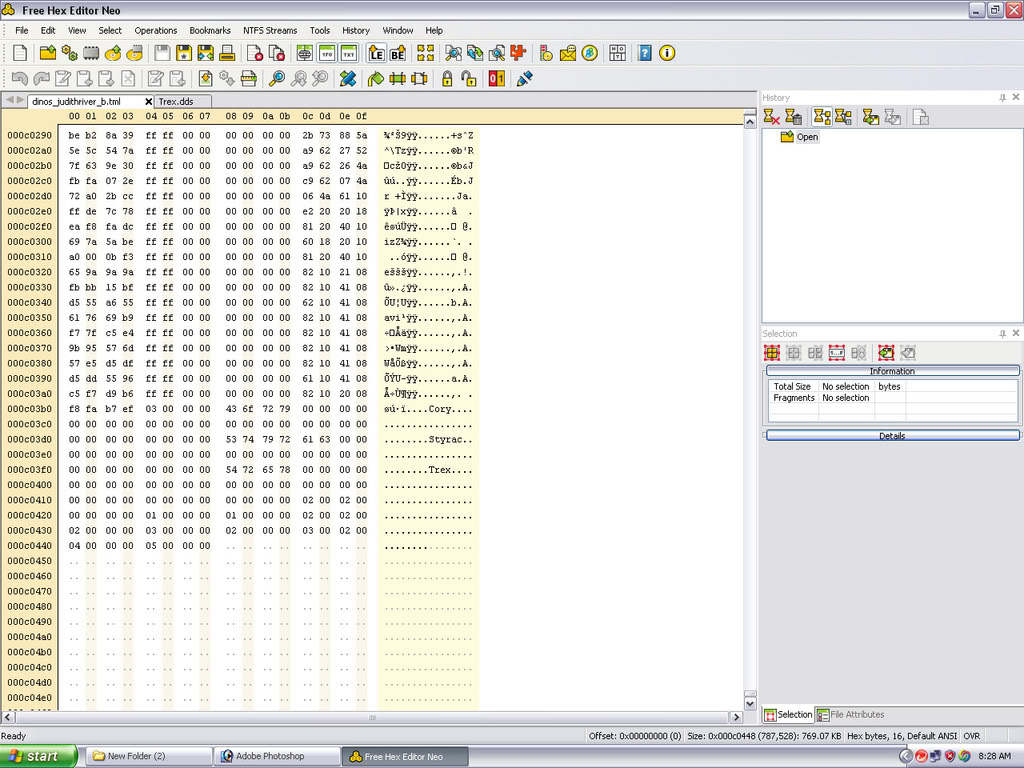
but they really arranged the opposite way... here is how they are arranged in the TML...
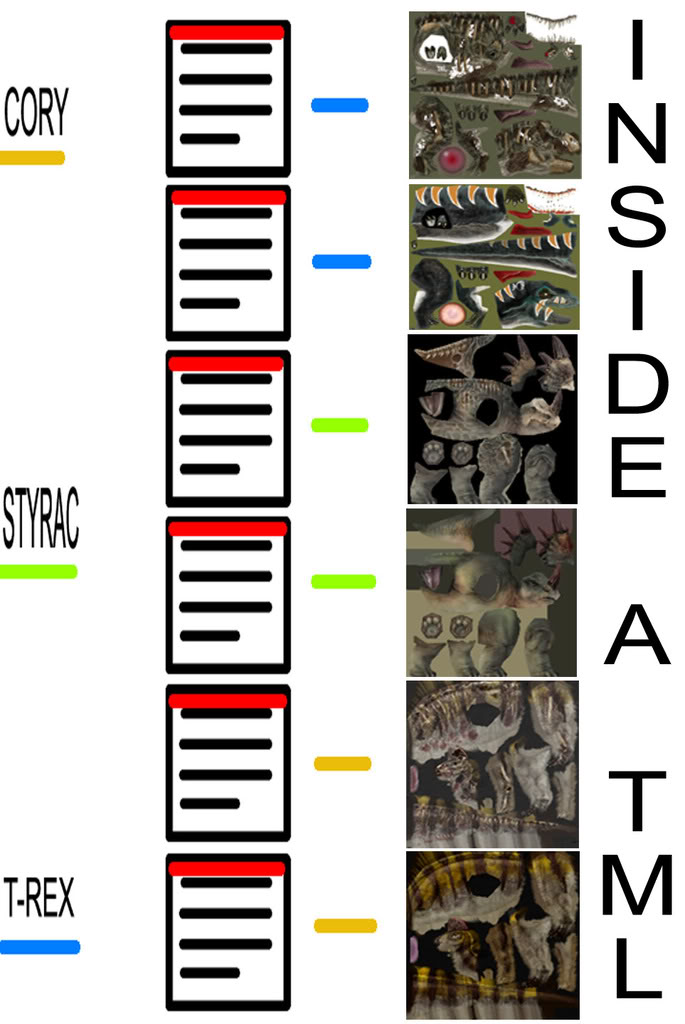
as you can see the dead skins are on the top and the dinosaur's live skin is under it...
the red highlight is the header of the DDS file inside the TML...
now click the skins' tab to go back, then click this icon which is the select all...
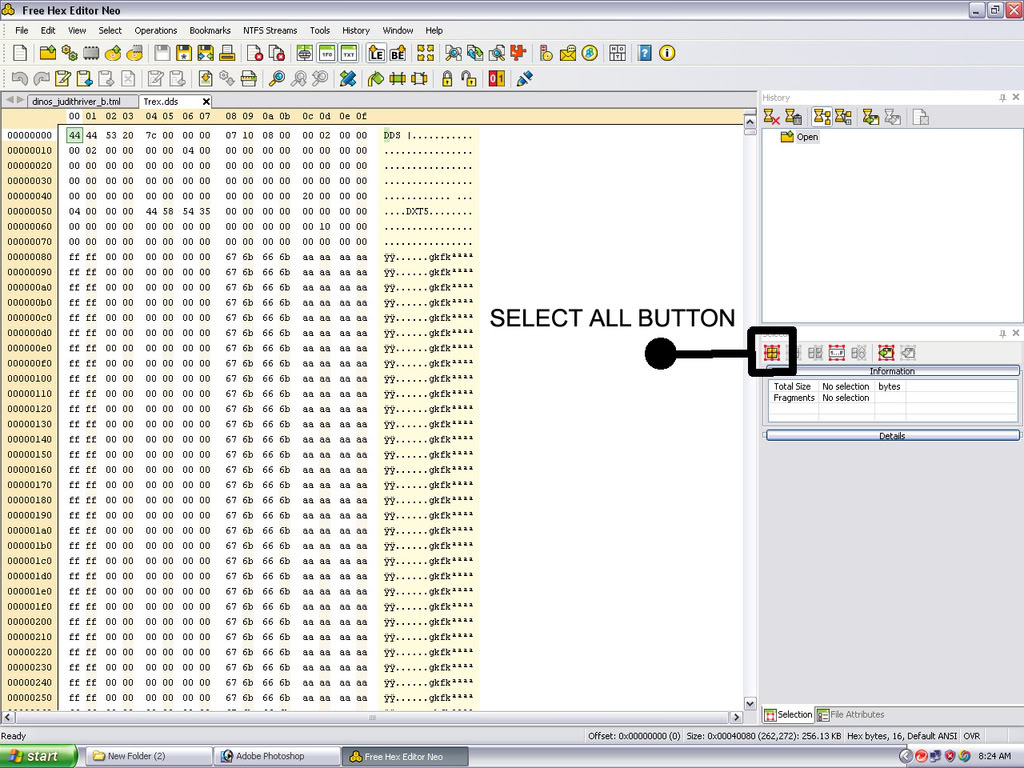
You will see that the whole DDS codes will be (blue) highlighted... then right-click or click the Edit button on the standard menu bar then click copy...
click the digsite's TML then right-click on it then click on find... a window will appear... then type in these numbers... these numbers are found in the header of the DDS file... after typing the numbers, click 'find'...
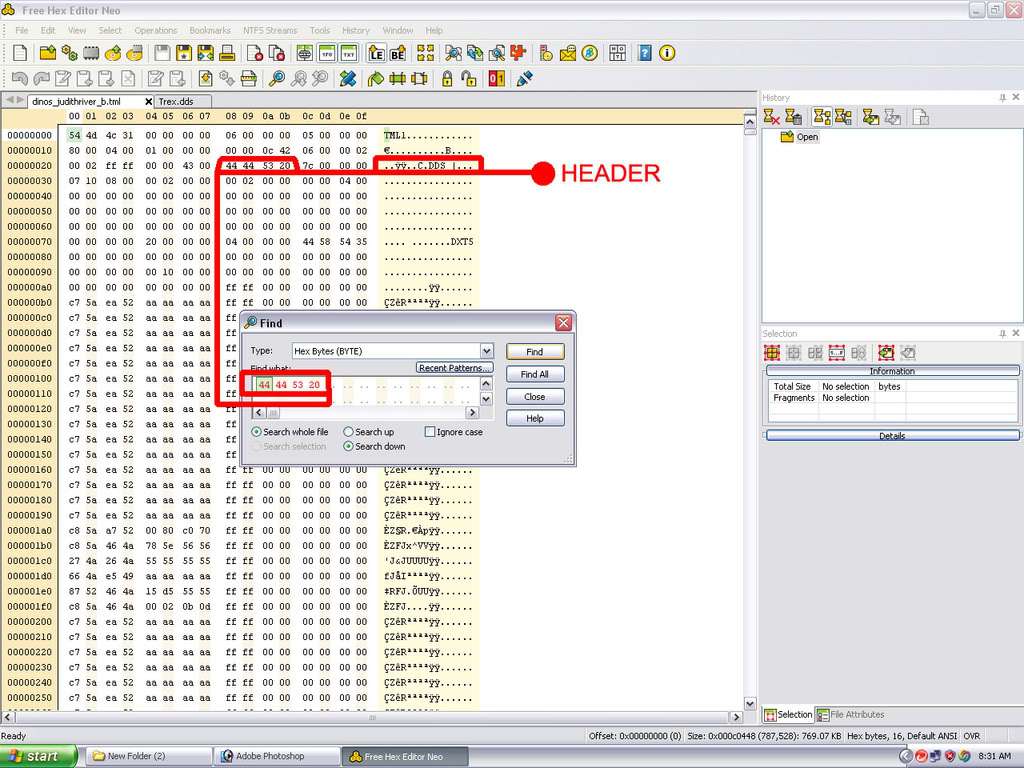
if you typed the numbers correctly, it will take you to the header of the first skin: the dead skin of the rex...
now you just have to press F3 or right-click and click on 'find next' to go to the header of the next skin under it which is the live T-rex skin...
now I'm ready to overwrite the live T-rex skin... simply right-click the click on 'Paste' or click on the Edit button on the stadard menu bar the click on paste...
once you done it, the header that you are on and the codes beneath it will be red highlighted...

now click on file on the standard menu bar then click on save... a window will appear that will ask you if you are sure to save the file, click 'yes'... you can now close the Hex Editor window...
now on your new folder, copy and paste it in your Matlibs folder... click 'yes' if it asks you if you want to overwrite... now start JPOG to test your new skin...
if the new skin is successfully in game, You've done it! that's all... Happy gaming... ^_^ _______________  deviantART: http://spinoinwonderland.deviantart.com/ deviantART: http://spinoinwonderland.deviantart.com/
Blog: http://sauropodomorphlair.blogspot.com/ | Imgur: http://spinoinwonderland.imgur.com/
Models | Skins | Mesozoic Revolution | |
|