- Dilophosaurus wrote:
- 1morey wrote:
- Here's my Population count by islands (Isla Matanceros, Isla Muerta, and Isla Tacaño)
Isla Matanceros:
- Spoiler:
Paddock 1:
Brachiosaurus- 3
Chungkingosaurus- 2
Edmontosaurus- 2
Huayangosaurus- 2
Parasaurolophus- 4
Triceratops- 2
Paddock 2:
Dracorex- 2
Paddock 3:
Velociraptor- 4
Paddock 4:
Indominus rex- 1
Isla Muerta:
- Spoiler:
Paddock 1:
Tyrannosaurus rex- 1
Paddock 2:
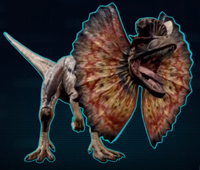
Dilophosaurus- 6
Paddock 3:
Indominus rex- 1
Paddock 4:
Chungkingosaurus-2
Edmontosaurus- 1
Huayangosaurus- 3
Maiasaura- 4
Paddock 5:
Metriacanthosaurus- 1
Velociraptor- 4
Paddock 6:
Ankylosaurus-1
Brachiosaurus- 3
Diplodocus- 2
Torosaurus- 2
Isla Tacaño:
- Spoiler:
Paddock 1:
Brachiosaurus- 2
Diplodocus- 2
Edmontosaurus- 1
Maiasaura- 5
Parasaurolophus- 4
Triceratops- 1
Paddock 2:
Chungkingosaurus- 3
Crichtonsaurus- 1
Diplodocus- 1
Huayangosaurus- 2
Paddock 3:
Tyrannosaurus rex- 1
Velociraptor- 4
Paddock 4:
Indominus rex- 1
Is it just me or are Brachiosaurus one of the worst species to keep contained? Mine has broken out more times than my T-Rex. Luckily it doesn't kill anyone when it escapes.
They're really particular about making sure they have adequate forest space, so I just spam-grow forests till they are satisfied, luckily, the other herbivores I keep with them don't seem to mind.
So far, it seems that Brachiosaurs and the Indominus rex are the most picky about their environment. (Though I don't know if this is the issue that Frontier said they would fix in regards to how their comfort levels work.)
However, my biggest issues are my raptors and Dilophosaurs on Isla Muerta because they freak out during storms, and I have to tranq them before they try to escape (luckily I built barriers around the walls they try to break through the most).
The following are just some general tips for people new to the game, or are struggling in certain areas.
Parasaurs and Maiasaurs absolutely must be in groups of 4 at the minimum (and need to be replaced ASAP if one dies), and Chungkingosaurs and Dracorex need to have at least two individuals in a paddock. Dracorex are better being either in a seperate paddock, or in a low population paddock, put them in a big group paddock, and they panic.
Ankylosaurus, Triceratops, Crichtonsaurus, Metriacanthosaurus, Diplodocus, and Edmontosaurus all are rather fine being the sole representative when grouped with other dinosaurs.
Ceratosaurs are fine in groups of two. On Isla Muerta, I had two in a paddock (before I sold them and replaced with an I. rex), with the lowest level fencing (the left paddock in the bowtie design when facing towards the mountains from the ocean), and I never had to worry about them at all, aside from refilling their feeders, and medicating them.
Struthiomimus are fine in small groups (I never really kept them, same with Gallis, except for mission objectives, and then I just sold them.)
Herbivore feeders need to be refilled on a very regular basis in large groups. (On Tacaño, my big herbivore paddock has like 3 tree feeders, and like 4/5 bush feeders. I'm constantly sending rangers over to refill them.)
Don't know much about the other dinosaurs, as I'm currently on Pena, trying to build up money. My starting dinosaur was a T. rex (less finicky than the Indominus which will try to break out of the pre-built paddock). And I'm just letting money build up right now.
It is really tiny FYI, and you're only going to have room for three paddocks (including the pre-built one), the rest of the park just kinda snakes around to the entrance, and there's not much room for else but guest facilities, a ranger station, and an ACU station (besides the pre-built buildings), maybe an extra power station (I tore down the starting one and replaced it with a medium power station).
Also, dinosaur genome settings carry over from park to park, so if you're going to dedicate a park to having color variants (Tacaño is suited for that to get a five star rating), you're going to have to constantly switch them on and off in the Hammond Labs when going between parks. (Luckily you can select the dinosaur out in the field and it will tell you what genomes it is using, so you won't have to worry about forgetting which genome is which.)
Also, another tip, build monorails around the border of the park, and put stations near paddock attractions, and place shops and hotels around them. You'll have 100% satisfaction in transport permanently, and food/drink/shop/fun satisfaction will dance around the mid to high 90s. Also put down emergency shelters in those areas which will boost their coverage to about 94%. Monorails also help with dinosaur visibility, and for my parks they go from around 74% to 90-ish% visibility. (It fluctuates because the monorails move)
Don't worry about storm defense stations except for Isla Muerta and Isla Pena. (Don't know about Sorna, since I haven't unlocked it yet), as they are useless on the other islands.
For Ranger and ACU stations, put two upgrade slots each for accuracy and reload speed, and one for task scheduling. When you manually control them, they shoot practically straight as an arrow.
Tranq'd dinosaurs are pretty much in a "cryostasis" effect, and their health, food, and water will not go down (at least last time I checked), so if you are trying to do a certain mission, and don't want to have to worry about a objective dinosaur dying, any threats can be halted till the mission is over.
Sell all security contract dinosaurs with modified genomes (unless you want to keep them), you'll get a nice amount of money from them.
If you are struggling with power, a substation can use power from two separate stations when connected to their pylons. Also throw on the power load upgrades, and reduced upkeep until you are making good money (as in, you're finances are 100 mil+), then replace reduced upkeep with the upgrade that reduces power outages. At that point, the upkeep isn't going to put any major dent in your finances.
Keep checking your shops/restaurants, as guests will fill them quickly when you have a good size/popular park.
At 1 staff, just sell the first option, 2-3 staff, sell option 2, and at 4-5 staff, sell item 3. (Also applies to the Gyrosphere Station as that has three different options as well.)
More staff means more guests can access that particular facility.
Since guests won't complain about prices, just set the sell price at double what its expense takes. (For example, Barbasol costs 10 dollars, so sell it for twenty).